Image Building and Management
Image Building Overview
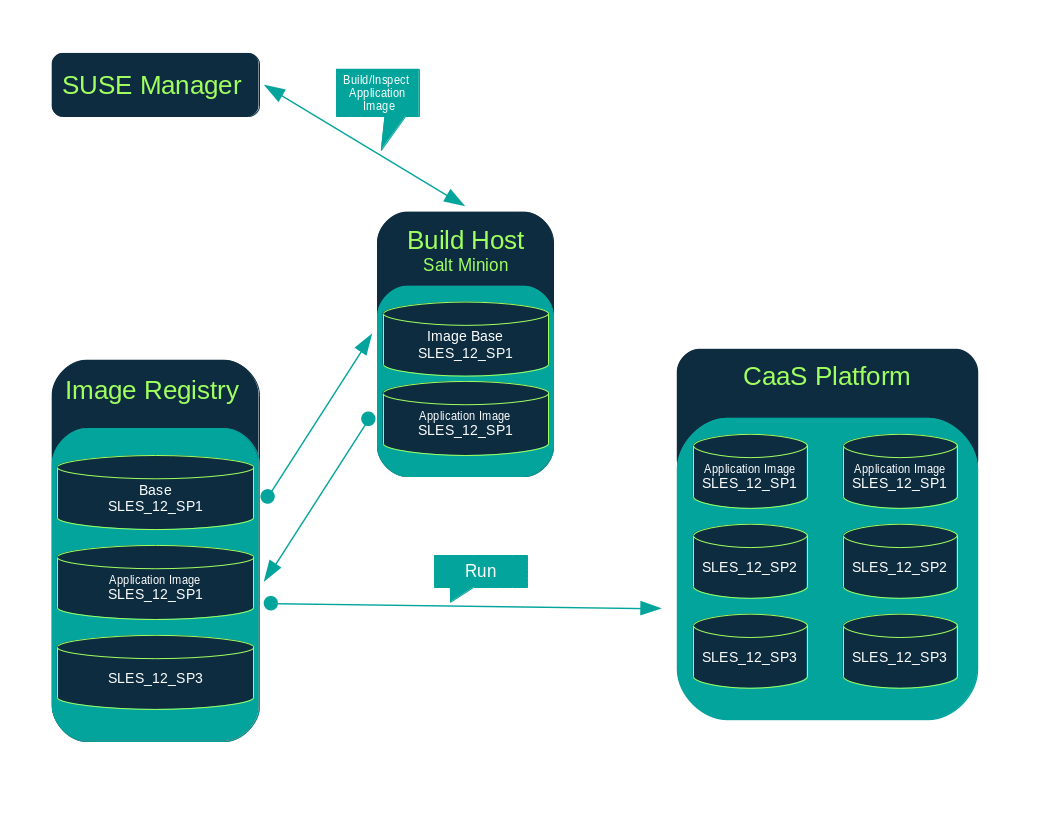
SUSE Manager enables system administrators to build containers, systems, and virtual images. SUSE Manager helps with creating image stores and managing image profiles.
SUSE Manager supports two distinct build types:
-
Dockerfile-for more information, see Container Images
-
Kiwi image system-for more information, see OS Images
Container Images
Requirements
The containers feature is available for Salt clients running SUSE Linux Enterprise Server 12 or later. Before you begin, ensure your environment meets these requirements:
-
An existing external GitHub or internal GitLab repository containing a dockerfile and configuration scripts (example scripts are provided in this chapter).
-
A properly configured image registry.
Registry Provider SolutionsIf you require a private image registry you can use an open source solution such as
Portus. For additional information on setting up Portus as a registry provider, see the Portus Documentation.For more information on Containers or CaaS Platform, see:
Creating a Build Host
To build images with SUSE Manager, you will need to create and configure a build host. Container build hosts are Salt clients running SUSE Linux Enterprise 12 or later. This section guides you through the initial configuration for a build host.
From the SUSE Manager Web UI, perform these steps to configure a build host:
-
Select a Salt client to be designated as a build host from the page.
-
From the
System Detailspage of the selected client assign the containers modules. Go to and enable the containers module (for example,SLE-Module-Containers15-PoolandSLE-Module-Containers15-Updates). Confirm by clicking Change Subscriptions. -
From the page, enable
Container Build Hostfrom theAdd-on System Typeslist and confirm by clicking Update Properties. -
Install all required packages by applying
Highstate. From the system details page select and clickApply Highstate. Alternatively, apply Highstate from the SUSE Manager Server command line:salt '$your_client' state.highstate
Define Container Build Channels with an Activation Key
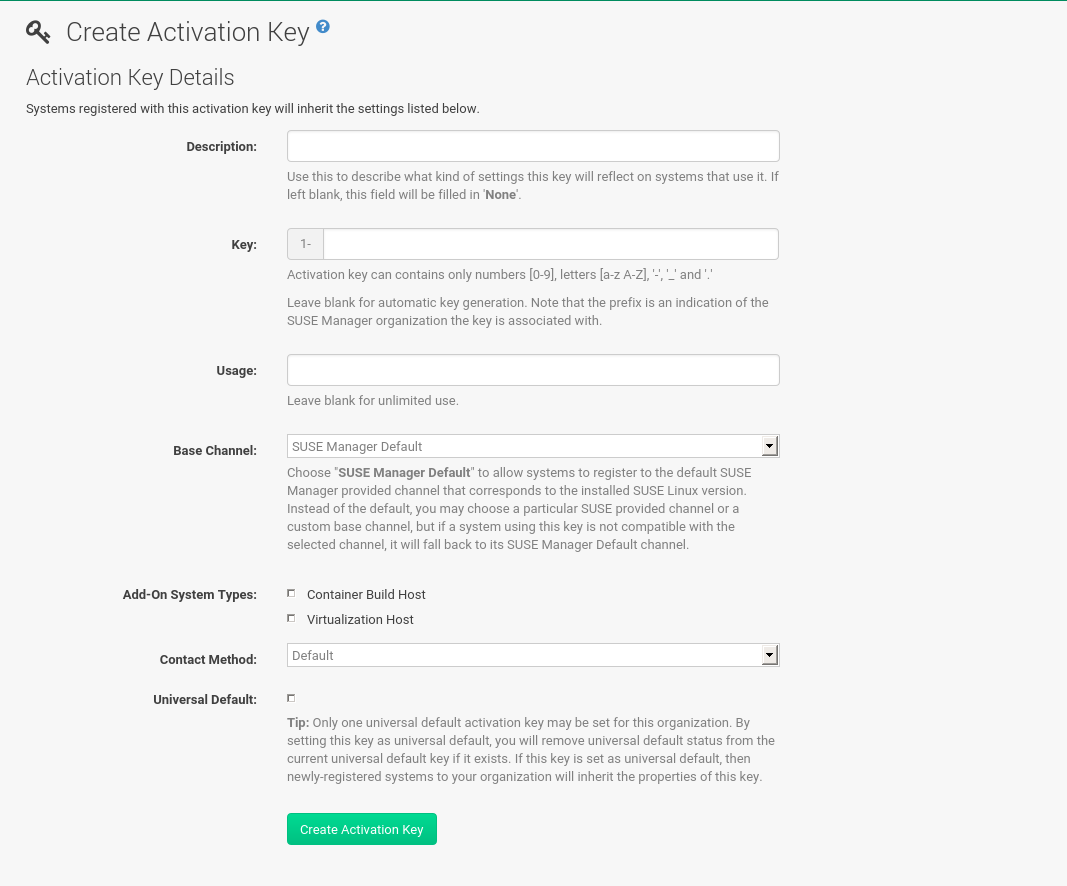
Create an activation key associated with the channel that your images will use.
|
Relationship Between Activation Keys and Image Profiles
To build containers, you will need an activation key that is associated with a channel other than |
-
Select .
-
Click Create Key.
-
Enter a
Descriptionand aKeyname. Use the drop-down menu to select theBase Channelto associate with this key. -
Confirm with Create Activation Key.
For more information, see [bp.key.managment].
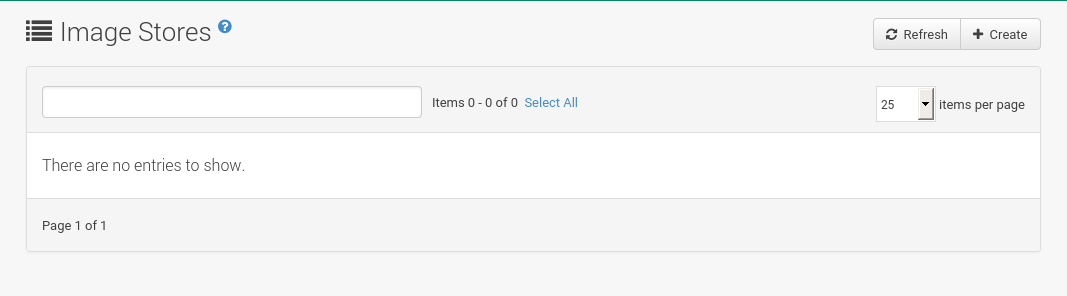
Creating an Image Store
Define a location to store all of your images by creating an image store.
-
Select .
-
Click
Createto create a new store.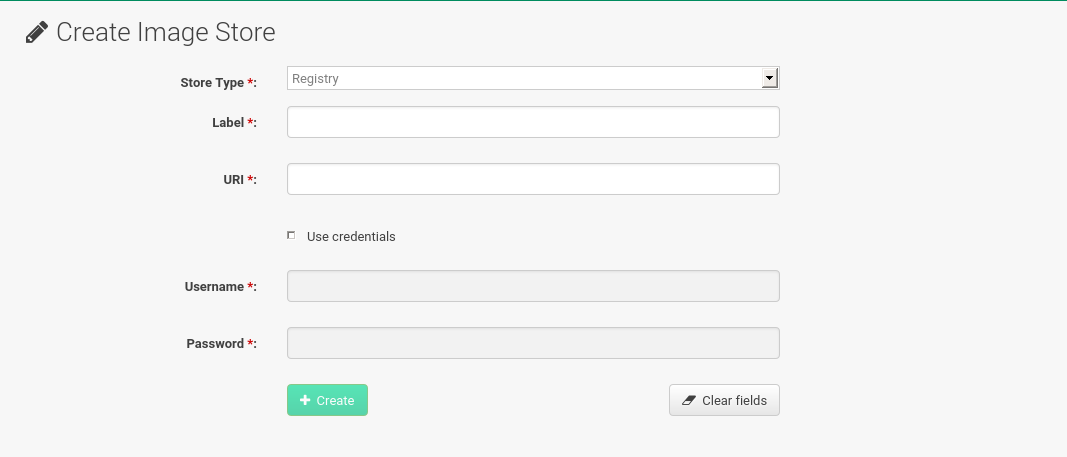
-
SUSE Manager currently provides support only for the
Registrystore type. Define a name for the image store in theLabelfield. -
Provide the path to your image registry by filling in the
URIfield, as a fully qualified domain name (FQDN) for the container registry host (whether internal or external).registry.example.com
The Registry URI can also be used to specify an image store on a registry that is already in use.
registry.example.com:5000/myregistry/myproject
-
Click Create to add the new image store.
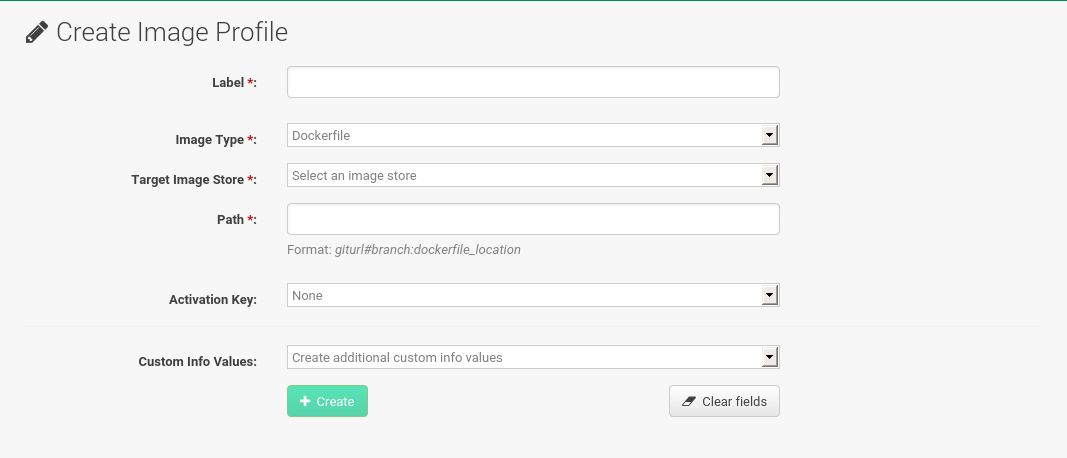
Creating an Image Profile
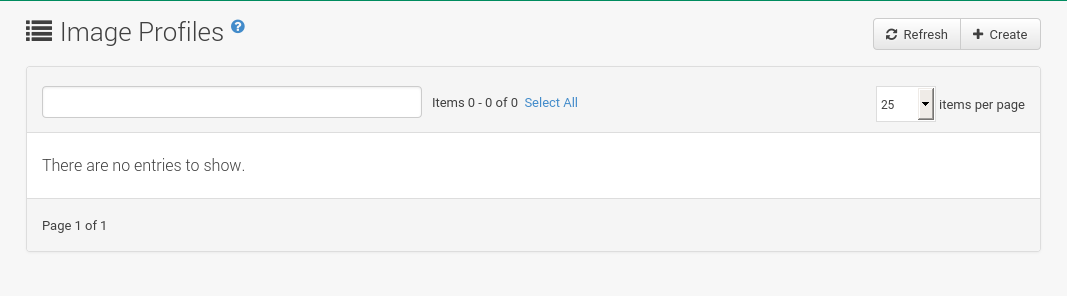
Manage image profiles from the Image Profile page.
-
To create an image profile select and click Create.
-
Provide a name for the image profile by filling in the
Labelfield.Only lowercase characters are permitted in container labels. If your container image tag is in a format such as
myproject/myimage, make sure your image store registry URI contains the/myprojectsuffix. -
Use a dockerfile as the
Image Type. -
Use the drop-down menu to select your registry from the
Target Image Storefield. -
Enter a Github or Gitlab repository URL (http, https, or token authentication) in the
Pathfield using one of the following formats:
-
Github single user project repository
https://github.com/USER/project.git#branchname:folder
-
Github organization project repository
https://github.com/ORG/project.git#branchname:folder
-
Github token authentication
If your git repository is private and not publicly accessible, you need to modify the profile’s git URL to include authentication. Use this URL format to authenticate with a Github token:
https://USER:<AUTHENTICATION_TOKEN>@github.com/USER/project.git#master:/container/
-
Gitlab single user project repository
https://gitlab.example.com/USER/project.git#master:/container/
-
Gitlab groups project repository
https://gitlab.example.com/GROUP/project.git#master:/container/
-
Gitlab token authentication
If your git repository is private and not publicly accessible, you need to modify the profile’s git URL to include authentication. Use this URL format to authenticate with a Gitlab token:
https://gitlab-ci-token:<AUTHENTICATION_TOKEN>@gitlab.example.com/USER/project.git#master:/container/
Specifying a Github or Gitlab BranchIf a branch is not specified, the
masterbranch will be used by default. If afolderis not specified the image sources (dockerfile sources) are expected to be in the root directory of the Github or Gitlab checkout.-
Select an
Activation Key. Activation Keys ensure that images using a profile are assigned to the correct channel and packages.Relationship Between Activation Keys and Image ProfilesWhen you associate an activation key with an image profile you are ensuring any image using the profile will use the correct software channel and any packages in the channel.
-
Click the Create button.
-
Example Dockerfile and add_packages Script
This section contains an example dockerfile. You specify a dockerfile that will be used during image building when creating an image profile. A dockerfile and any associated scripts should be stored within an external or internal Github or Gitlab repository.
The dockerfile provides access to a specific repository version served by SUSE Manager.
The following example dockerfile is used by SUSE Manager to trigger a build job on a build host.
The ARG parameters ensure that the built image is associated with the desired repository version served by SUSE Manager.
The ARG parameters also allow you to build image versions of SUSE Linux Enterprise Server which may differ from the version of SUSE Linux Enterprise Server used by the build host itself.
For example: The ARG repo parameter and the echo command pointing to the repository file, creates and then injects the correct path into the repository file for the desired channel version.
The repository version is determined by the activation key that you assigned to your image profile.
FROM registry.example.com/sles12sp2
MAINTAINER Tux Administrator "tux@example.com"

### Begin: These lines Required for use with {productname}

ARG repo
ARG cert

# Add the correct certificate
RUN echo "$cert" > /etc/pki/trust/anchors/RHN-ORG-TRUSTED-SSL-CERT.pem

# Update certificate trust store
RUN update-ca-certificates

# Add the repository path to the image
RUN echo "$repo" > /etc/zypp/repos.d/susemanager:dockerbuild.repo

### End: These lines required for use with {productname}

# Add the package script
ADD add_packages.sh /root/add_packages.sh

# Run the package script
RUN /root/add_packages.sh

# After building remove the repository path from image
RUN rm -f /etc/zypp/repos.d/susemanager:dockerbuild.repo
This is an example add_packages.sh script for use with your dockerfile:
#!/bin/bash
set -e

zypper --non-interactive --gpg-auto-import-keys ref

zypper --non-interactive in python python-xml aaa_base aaa_base-extras net-tools timezone vim less sudo tar
|
Packages Required for Inspecting Your Images
To inspect images and provide the package and product list of a container to the SUSE Manager Web UI you must install python and python-xml within the container. Without these packages your images will still build, but the package and product list will be unavailable from the Web UI. |
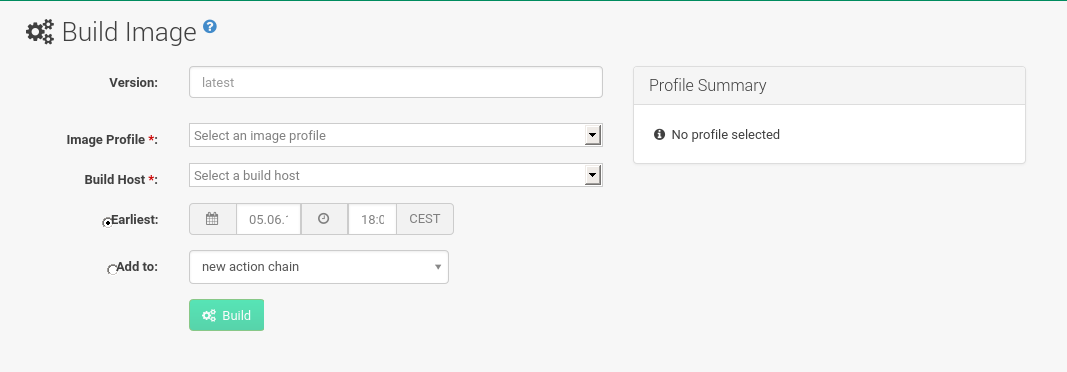
Building an Image
There are two ways to build an image. You can select from the left navigation bar, or click the build icon in the list.
-
Select .
-
Add a different tag name if you want a version other than the default
latest(only relevant to containers). -
Select
Build ProfileandBuild Host.Profile SummaryNotice the
Profile Summaryto the right of the build fields. When you have selected a build profile, detailed information about the selected profile will be displayed in this area. -
To schedule a build click the Build button.
Importing an Image
You can import and inspect arbitrary images.
Select from the left navigation bar.
Complete the text boxes of the Import dialog.
When it has processed, the imported image will be listed on the Image List page.
-
From click Import to open the
Import Imagedialog. -
In the
Import Imagedialog complete these fields:- Image store
-
The registry from where the image will be pulled for inspection.
- Image name
-
The name of the image in the registry.
- Image version
-
The version of the image in the registry.
- Build host
-
The build host that will pull and inspect the image.
- Activation key
-
The activation key that provides the path to the software channel that the image will be inspected with.
-
For confirmation, click Import.
The entry for the image is created in the database, and an Inspect Image action on SUSE Manager is scheduled.
When it has been processed, you can find the imported image in the Image List.
It has a different icon in the Build column, to indicate that the image is imported.
The status icon for the imported image can also be seen on the Overview tab for the image.
Troubleshooting
These are some known problems when working with images:
-
HTTPS certificates to access the registry or the git repositories should be deployed to the client by a custom state file.
-
SSH git access using Docker is currently unsupported. You may test it, but SUSE will not provide support.
-
If the python and python-xml packages are not installed in your images during the build process, Salt cannot run within the container and reporting of installed packages or products will fail. This will result in an
unknownupdate status.
OS Images
OS images are built by the Kiwi image system. They can be of various types: PXE, QCOW2, LiveCD images, and others.
For more information about the Kiwi build system, see the Kiwi documentation.
Requirements
The Kiwi image building feature is available for Salt clients running SUSE Linux Enterprise Server 12. It is currently not supported to build SUSE Linux Enterprise 15 images. Building SUSE Linux Enterprise 15 images requires a SUSE Linux Enterprise 15 based build host.
Kiwi image configuration files and configuration scripts must be accessible in one of these locations:
-
Git repository
-
HTTP hosted tarball
-
Local build host directory
Example scripts are provided in Example of Kiwi Sources.
|
Hardware Requirements for Hosts Running OS Images
Hosts running OS images built with Kiwi need at least 1 GB of RAM. Disk space depends on the actual size of the image. For more information, see the documentation of the underlying system. |
Creating a Build Host
To build all kinds of images with SUSE Manager, create and configure a build host. OS image build hosts are Salt clients running SUSE Linux Enterprise Server 12 (SP3 or later) or 15. This procedure will guide you through the initial configuration for a build host.
From the SUSE Manager Web UI, perform these steps to configure a build host:
-
Select a client that will be designated as a build host from the page.
-
From the page, enable the
Add-on System Type:OS Image Build Hostand confirm with Update Properties.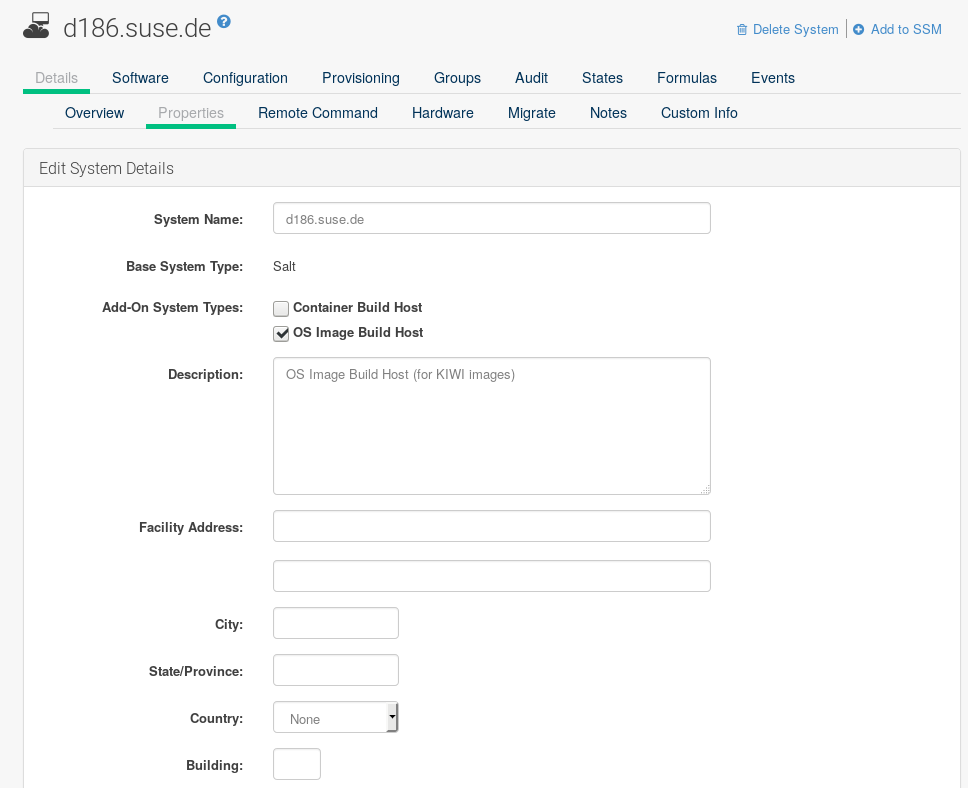
-
From the page, enable
SLE-Manager-Tools12-PoolandSLE-Manager-Tools12-Updates(or a later version). Schedule and click Confirm. -
Install Kiwi and all required packages by applying
Highstate. From the system details page select and click Apply Highstate. Alternatively, apply Highstate from the SUSE Manager Server command line:salt '$your_client' state.highstate
Build host provisioning copies the SUSE Manager certificate RPM to the build host. This certificate is used for accessing repositories provided by SUSE Manager.
The certificate is packaged in RPM by the mgr-package-rpm-certificate-osimage package script.
The package script is called automatically during a new SUSE Manager installation.
When you upgrade the spacewalk-certs-tools package, the upgrade scenario will call the package script using the default values.
However if the certificate path was changed or unavailable, you will need to call the package script manually using --ca-cert-full-path <path_to_certificate> after the upgrade procedure has finished.
/usr/sbin/mgr-package-rpm-certificate-osimage --ca-cert-full-path /root/ssl-build/RHN-ORG-TRUSTED-SSL-CERTThe RPM package with the certificate is stored in a salt-accessible directory such as /usr/share/susemanager/salt/images/rhn-org-trusted-ssl-cert-osimage-1.0-1.noarch.rpm.
The RPM package with the certificate is provided in the local build host repository /var/lib/Kiwi/repo.
|
The RPM Package with the SUSE Manager Certificate Must Be Specified in the Build Source
Make sure your build source Kiwi configuration contains config.xml
|
Define Kiwi Build Channels with an Activation Key
Create an activation key associated with the channel that your images will use. Activation keys are mandatory for OS image building.
|
Relationship Between Activation Keys and Image Profiles
To build OS images, you will need an activation key that is associated with a channel other than |
-
In the Web UI, select .
-
Click
Create Key. -
Enter a
Description, aKeyname, and use the drop-down box to select aBase Channelto associate with the key. -
Confirm with Create Activation Key.
For more information, see [bp.key.managment].
Image Store
OS images can require a significant amount of storage space.
Therefore, we recommended that the OS image store is located on a partition of its own or on a Btrfs subvolume, separate from the root partition.
By default, the image store will be located at /srv/www/os-images.
|
Image Stores for Kiwi Build Type
Image stores for Kiwi build type, used to build system, virtual, and other images, are not supported yet. Images are always stored in |
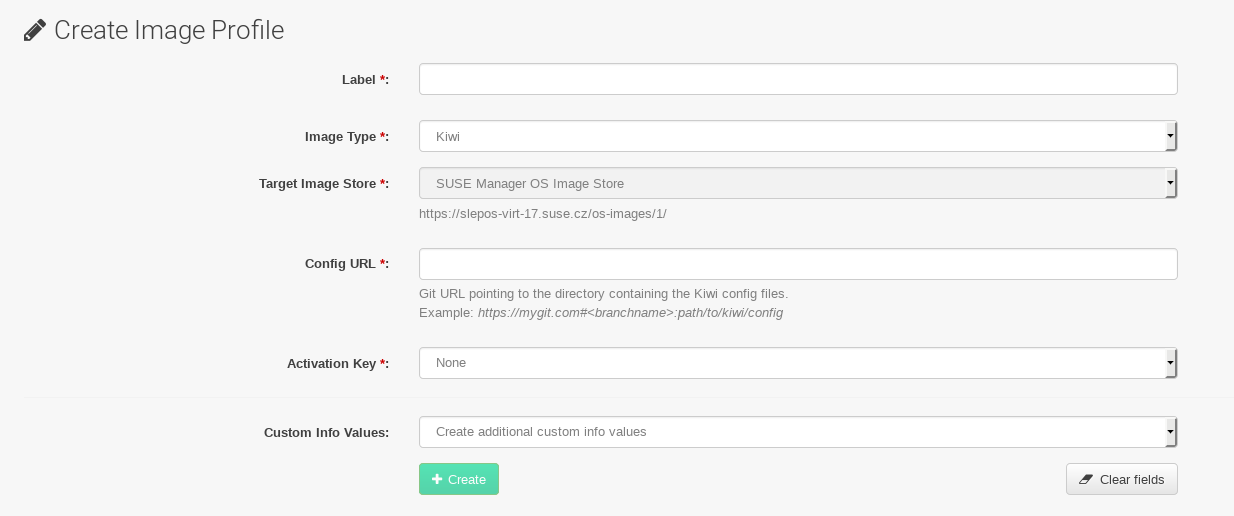
Creating an Image Profile
Manage image profiles using the Web UI.
-
To create an image profile select from and click Create.
-
In the
Labelfield, provide a name for theImage Profile. -
Use
Kiwias theImage Type. -
Image store is automatically selected.
-
Enter a
Config URLto the directory containing the Kiwi configuration files:-
Git URI
-
HTTPS tarball
-
Path to build host local directory
-
-
Select an
Activation Key. Activation keys ensure that images using a profile are assigned to the correct channel and packages.Relationship Between Activation Keys and Image ProfilesWhen you associate an activation key with an image profile you are ensuring any image using the profile will use the correct software channel and any packages in the channel.
-
Confirm with the Create button.
-
Git/HTTP(S) URL to the repository
URL to the Git repository containing the sources of the image to be built. Depending on the layout of the repository the URL can be:
https://github.com/SUSE/manager-build-profiles
You can specify a branch after the
#character in the URL. In this example, we use themasterbranch:https://github.com/SUSE/manager-build-profiles#master
You can specify a directory that contains the image sources after the
:character. In this example, we useOSImage/POS_Image-JeOS6:https://github.com/SUSE/manager-build-profiles#master:OSImage/POS_Image-JeOS6
-
HTTP(S) URL to the tarball
URL to the tar archive, compressed or uncompressed, hosted on the webserver.
https://myimagesourceserver.example.org/MyKiwiImage.tar.gz
-
Path to the directory on the build host
Enter the path to the directory with the Kiwi build system sources. This directory must be present on the selected build host.
/var/lib/Kiwi/MyKiwiImage
Example of Kiwi Sources
Kiwi sources consist at least of config.xml.
Usually, config.sh and images.sh are present as well.
Sources can also contain files to be installed in the final image under the root subdirectory.
For information about the Kiwi build system, see the Kiwi documentation.
SUSE provides examples of fully functional image sources at the SUSE/manager-build-profiles public GitHub repository.
<?xml version="1.0" encoding="utf-8"?>

<image schemaversion="6.1" name="POS_Image_JeOS6">
    <description type="system">
        <author>Admin User</author>
        <contact>noemail@example.com</contact>
        <specification>SUSE Linux Enterprise 12 SP3 JeOS</specification>
    </description>
    <preferences>
        <version>6.0.0</version>
        <packagemanager>zypper</packagemanager>
        <bootsplash-theme>SLE</bootsplash-theme>
        <bootloader-theme>SLE</bootloader-theme>

        <locale>en_US</locale>
        <keytable>us.map.gz</keytable>
        <timezone>Europe/Berlin</timezone>
        <hwclock>utc</hwclock>

        <rpm-excludedocs>true</rpm-excludedocs>
        <type boot="saltboot/suse-SLES12" bootloader="grub2" checkprebuilt="true" compressed="false" filesystem="ext3" fsmountoptions="acl" fsnocheck="true" image="pxe" kernelcmdline="quiet"></type>
    </preferences>
    <!--    CUSTOM REPOSITORY
    <repository type="rpm-dir">
      <source path="this://repo"/>
    </repository>
    -->
    <packages type="image">
        <package name="patterns-sles-Minimal"/>
        <package name="aaa_base-extras"/> <!-- wouldn't be SUSE without that ;-) -->
        <package name="kernel-default"/>
        <package name="salt-minion"/>
        ...
    </packages>
    <packages type="bootstrap">
        ...
        <package name="sles-release"/>
        <!-- this certificate package is required to access {productname} repositories
             and is provided by {productname} automatically -->
        <package name="rhn-org-trusted-ssl-cert-osimage" bootinclude="true"/>

    </packages>
    <packages type="delete">
        <package name="mtools"/>
        <package name="initviocons"/>
        ...
    </packages>
</image>
Building an Image
There are two ways to build an image using the Web UI. Either select , or click the build icon in the list.
-
Select .
-
Add a different tag name if you want a version other than the default
latest(applies only to containers). -
Select the
Image Profileand aBuild Host.Profile SummaryA
Profile Summaryis displayed to the right of the build fields. When you have selected a build profile, detailed information about the selected profile will show up in this area. -
To schedule a build, click the Build button.
Image Inspection and Salt Integration
After the image is successfully built, the inspection phase begins. During the inspection phase SUSE Manager collects information about the image:
-
List of packages installed in the image
-
Checksum of the image
-
Image type and other image details
|
If the built image type is The generated pillar is available to all connected clients. |
Troubleshooting
Building an image requires of several dependent steps. When the build fails, investigation of Salt states results can help you to identify the source of the failure. Usual checks when the build fails:
-
The build host can access the build sources
-
There is enough disk space for the image on both the build host and the SUSE Manager server
-
The activation key has the correct channels associated with it
-
The build sources used are valid
-
The RPM package with the SUSE Manager public certificate is up to date and available at
/usr/share/susemanager/salt/images/rhn-org-trusted-ssl-cert-osimage-1.0-1.noarch.rpm. For more on how to refresh a public certificate RPM, see Creating a Build Host.
Limitations
The section contains some known issues when working with images.
-
HTTPS certificates used to access the HTTP sources or Git repositories should be deployed to the client by a custom state file, or configured manually.
-
Importing Kiwi-based images is not supported.
Listing Image Profiles Available for Building
To list images available for building select . A list of all images will be displayed.
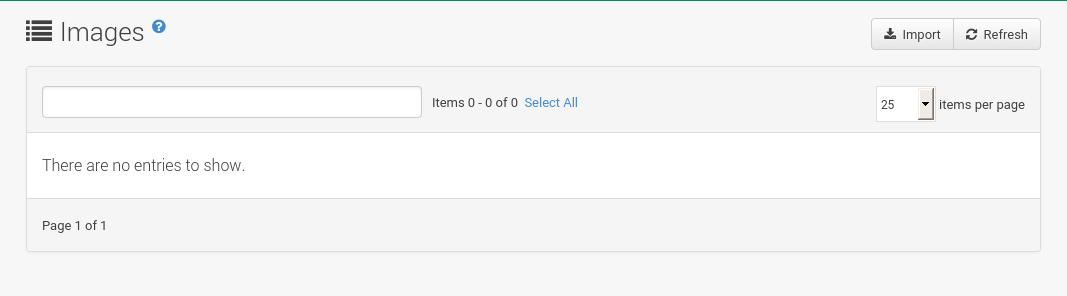
Displayed data about images includes an image Name, its Version and the build Status.
You will also see the image update status with a listing of possible patch and package updates that are available for the image.
Clicking the Details button on an image will provide a detailed view. The detailed view includes an exact list of relevant patches and a list of all packages installed within the image.
|
The patch and the package list is only available if the inspect state after a build was successful. |