Activation Keys
Users with the Activation Key Administrator role (including SUSE Manager Administrators) can generate activation keys in the SUSE Manager Web UI.
With such an activation key, register a SUSE Linux Enterprise or Red Hat Enterprise Linux system, entitle the system to a SUSE Manager service level and subscribe the system to specific channels and system groups through the rhnreg_ks command line utility.
|
System-specific activation keys created through the |
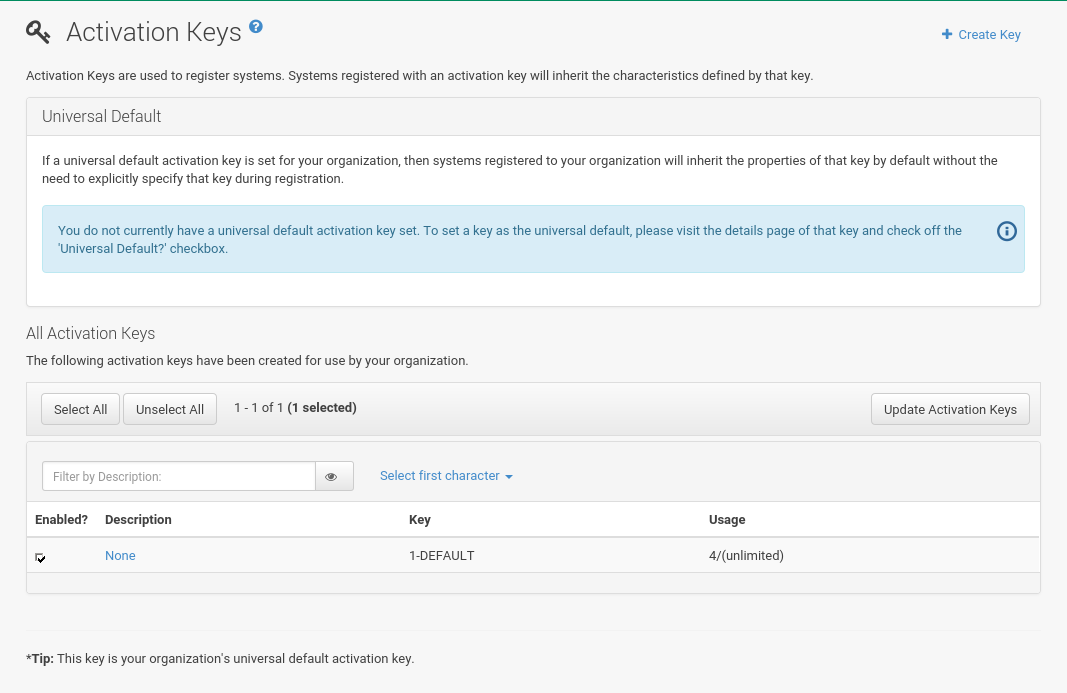
Managing Activation Keys
From the Activation Key page organize activation keys for channel management.
To create an activation key:
-
Select from the left bar.
-
Click the
Create Keylink at the upper right corner. -
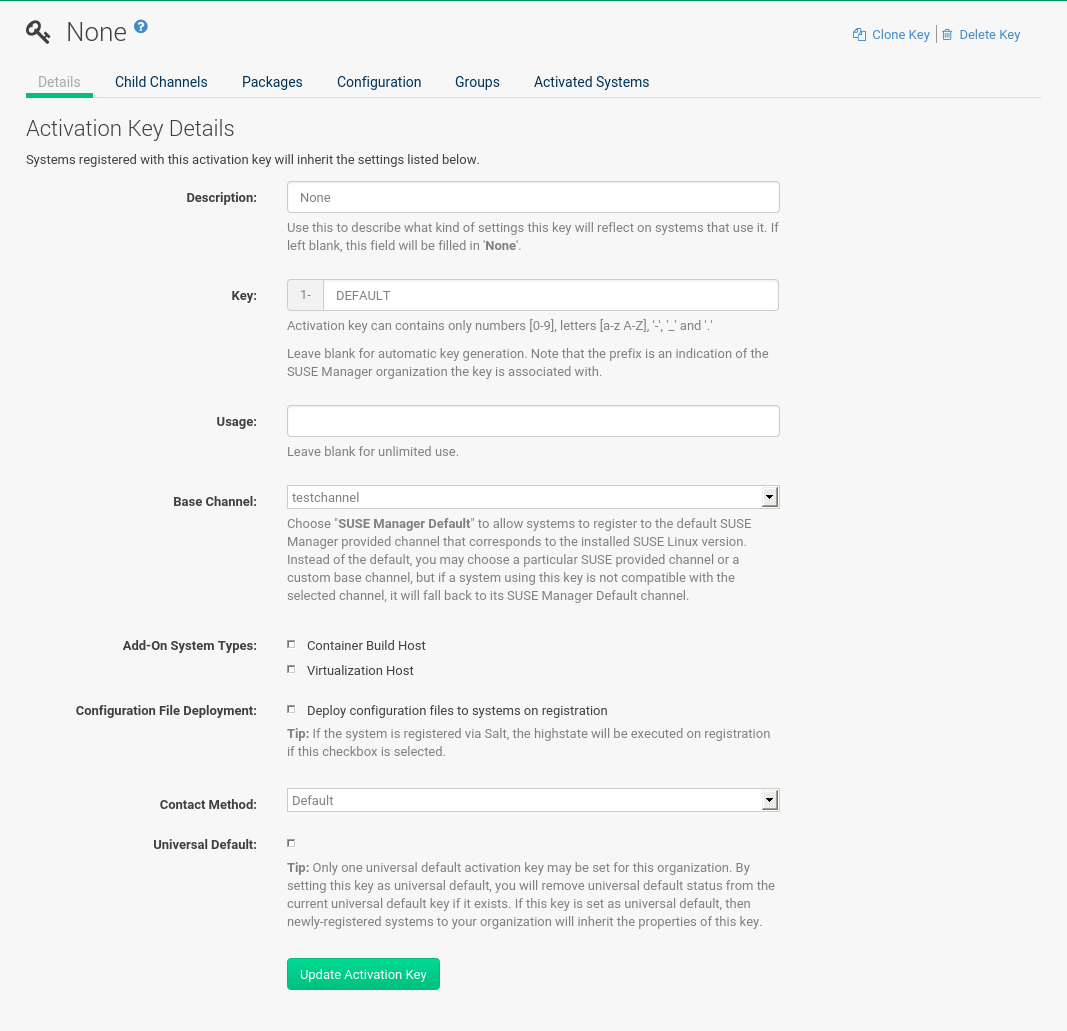
Description— Enter aDescriptionto identify the generated activation key. -
Key— Either choose automatic generation by leaving this field blank or enter the key you want to generate in theKeyfield. This string of characters can then be used withrhnreg_ksto register client systems with SUSE Manager. For more details, see reference:systems/activation-keys.adoc.Allowed CharactersDo not insert commas or double quotes in the key. All other characters are allowed, but
<> (){}(this includes the space) will get removed automatically. If the string is empty, a random one is generated.Commas are problematic because they are used as separator when two or more activation keys are used at once.
-
Usage— The maximum number systems that can be registered with the activation key concurrently. Leave blank for unlimited use. Deleting a system profile reduces the usage count by one and registering a system profile with the key increases the usage count by one. -
Base Channels— The primary channel for the key. This can be either theSUSE Manager Defaultchannel, a SUSE provided channel, or a custom base channel.Selecting
SUSE Manager Defaultallows client systems to register with the SUSE-provided default channel that corresponds with their installed version of SUSE Linux Enterprise. You can also associate the key with a custom base channel. If a system using this key is not compatible with the selected channel, it will fall back to the SUSE Manager default channel. -
Child Channels— When the base channel is selected the list of available child channels will get fetched and display in real time below the base channel. Select the child channels you need (for example, the Tools child channel). -
Add-on System Types— The supplemental system types for the key, for example, Virtualization Host. All systems will receive these system types with the key. -
Contact Method- Select how clients communicate with SUSE Manager.Default(Pull) waits for the client to check in. WithPush via SSHandPush via SSH tunnelthe server contacts the client via SSH (with or without tunnel) and pushes updates and actions, etc.For more information about contact methods, see client-configuration:contact-methods.adoc.
-
Universal Default— Select whether this key should be considered the primary activation key for your organization.Changing the Default Activation KeyOnly one universal default activation key can be defined per organization. If a universal key already exists for this organization, you will unset the currently used universal key by activating the check box. -
Click Create Activation Key.
To create more activation keys, repeat the steps above.
After creating the unique key, it appears in the list of activation keys along with the number of times it has been used. Only Activation Key Administrators can see this list. At this point, you can configure the key further. For example, associate the key with packages (for example, the mgr-cfg-actions package) and groups. Systems registered with the key get automatically subscribed to them.
To change the settings of a key, click the key’s description in the list to display its Details page. Via additional tabs you can select packages, configuration channels, group membership, and view activated systems.
Modify the appropriate tab then click the Update Activation Key button.
To disassociate groups from a key, deselect them in the respective menus by Ctrl-clicking their highlighted names.
To remove a key entirely, click the Delete Key link in the upper right corner of the Details page.
In the upper right corner find also the Clone Key link.
Any (client tools) package installation requires that the Client Tools channel is available and the Provisioning check box is selected.
The Client Tools channel should be selected in the Child Channels listing below the selected base channel.
After creating the activation key, you can see in the Details tab a check box named Configuration File Deployment.
If you select it, all needed packages are automatically added to the Packages list.
In case of Salt clients the Configuration File Deployment option also ensures that highstate will get applied automatically.
By default, the following packages are added: mgr-cfg, mgr-cfg-client, and mgr-cfg-actions.
If you select Virtualization Host you automatically get the following package: mgr-virtualization-host.
Adding the mgr-osad package makes sense to execute scheduled actions immediately after the schedule time.
When the activation key is created, you can add packages with selecting the key (), then on the activation key details page, go for the Packages tab and add mgr-osad.
To disable system activations with a key, uncheck the corresponding box in the Enabled column in the key list.
The key can be re-enabled by selecting the check box.
Click the Update Activation Keys button on the bottom right-hand corner of the page to apply your changes.
Using Multiple Activation Keys at Once
Multiple activation keys can be specified at the command line or in a single autoinstallation profile.
This allows you to aggregate the aspects of various keys without re-creating a specific key for every system that you want to register, simplifying the registration and autoinstallation processes while slowing the growth of your key list.
Separate keys with a comma at the command line with rhnreg_ks or in a Kickstart profile in the Activation Keys tab of the Autoinstallation Details page.
Registering with multiple activation keys requires some caution. Conflicts between some values cause registration to fail. Conflicts in the following values do not cause registration to fail, a combination of values is applied: software packages, software child channels, and configuration channels. Conflicts in the remaining properties are resolved in the following manner:
-
Base software channels: registration fails.
-
System types: registration fails.
-
Enable configuration flag: configuration management is set.
Do not use system-specific activation keys along with other activation keys; registration fails in this event.
You are now ready to use multiple activation keys at once.