SD Provisioning
Provisioning Overview
The Provisioning tab and its subtabs allow you to schedule and monitor AutoYaST or Kickstart installations and to restore a system to its previous state.
|
Available for Clients Using the “Traditional” Method
The note |
AutoYaST is a SUSE Linux Enterprise and Kickstart is a Red Hat utility-both allow you to automate the reinstallation of a system. Snapshot rollbacks provide the ability to revert certain changes on the system. You can roll back a set of RPM packages, but rolling back across multiple update levels is not supported. Both features are described in the sections that follow.
Autoinstallation
The Schedule subtab allows you to configure and schedule an autoinstallation for this system.
For background information about autoinstallation, see reference:systems/autoinst-overview.adoc.
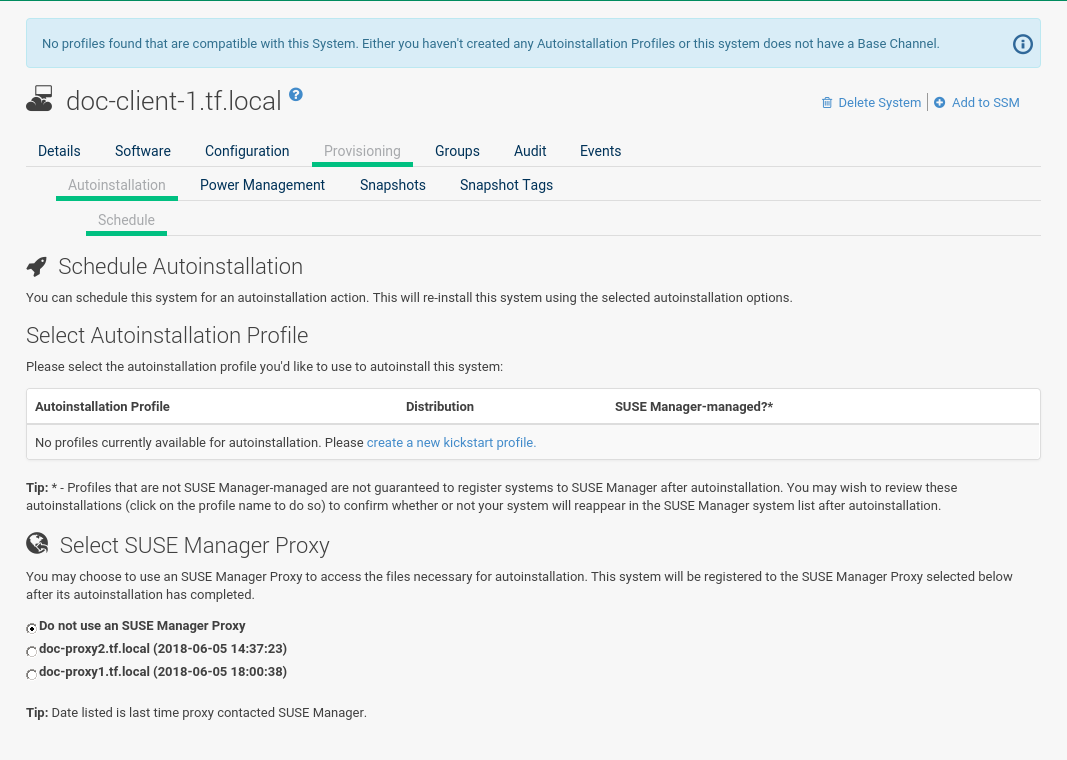
In the Schedule subtab, schedule the selected system for autoinstallation.
Choose from the list of available profiles.
|
You must create a profile before it appears on this subtab. For more information about profiles, see reference:systems/autoinst-profiles.adoc. |
To alter autoinstallation settings, click the Advanced Configuration button.
Configure the network connection and post-installation networking information.
You can aggregate multiple network interfaces into a single logical "bonded" interface.
In Kernel Options specify kernel options to be used during autoinstallation. Post Kernel Options are used after the installation is complete and the system is booting for the first time.
Configure package profile synchronization.
Select a time for the autoinstallation to begin and click Schedule Autoinstall and Finish for all changes to take effect and to schedule the autoinstallation.
Alternatively, click Create PXE Installation Configuration to create a Cobbler system record.
The selected autoinstallation profile will be used to automatically install the configured distribution next time that particular system boots from PXE.
In this case SUSE Manager and its network must be properly configured to allow boot using PXE.
|
Any settings changed on the |
The Variables subtab can be used to create Kickstart variables, which substitute values in Kickstart files.
To define a variable, create a name-value pair (name/value) in the text box.
For example, to Kickstart a system that joins the network of a specific organization (for example the Engineering department) you can create a profile variable to set the IP address and the gateway server address to a variable that any system using that profile will use.
Add the following line to the Variables text box:
IPADDR=192.168.0.28
GATEWAY=192.168.0.1
To use the system variable, use the name of the variable in the profile instead of the value.
For example, the network portion of a Kickstart file could look like the following:
network --bootproto=static --device=eth0 --onboot=on --ip=$IPADDR \
  --gateway=$GATEWAY
The $IPADDR will be 192.168.0.28, and the $GATEWAY will be 192.168.0.1.
|
There is a hierarchy when creating and using variables in Kickstart files. System Kickstart variables take precedence over profile variables, which in turn take precedence over distribution variables. Understanding this hierarchy can alleviate confusion when using variables in Kickstart. |
Using variables are one part of the larger Cobbler infrastructure for creating templates that can be shared between multiple profiles and systems. For more information about Cobbler and Kickstart templates, see client-configuration:cobbler.adoc.
Power Management
SUSE Manager allows you to power on, off, and reboot systems via the IPMI protocol if the systems are IPMI-enabled.
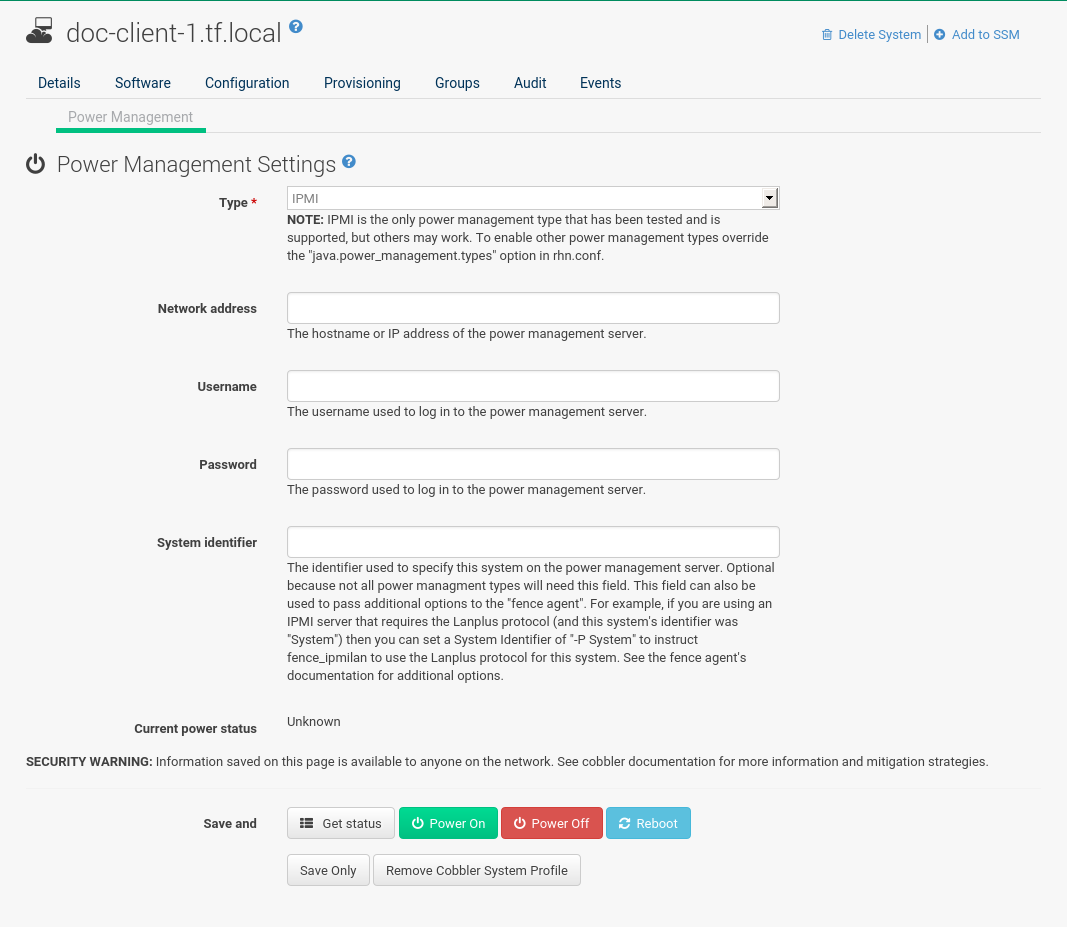
You need a fully patched SUSE Manager installation. To use any power management functionality, IPMI configuration details must be added to SUSE Manager. First select the target system on the systems list, then select . On the displayed configuration page, edit all required fields (marked with a red asterisk) and click Save only.
Systems can be powered on, off, or rebooted from the configuration page via corresponding buttons. Note that any configuration change is also saved in the process. The Get Status button can be used to query for the system’s power state. If configuration details are correct, a row is displayed with the current power status ("on" or "off"). If a power management operation succeeds on a system, it will also be noted in its subtab.
Power management functionalities can also be used from the system set manager to operate on multiple systems at the same time. Specifically, you can change power management configuration parameters or apply operations (power on, off, reboot) to multiple systems at once:
-
Add the respective systems to the system set manager. For more information, see reference:systems/ssm-overview.adoc.
-
Select systems on the , then to change one or more configuration parameters for all systems in the set. Note that any field left blank will not alter the configuration parameter in selected systems.
-
When all configuration parameters are set correctly, click to power on, off or reboot systems from the set.
To check that a power operation was executed correctly, click , then click the proper line in the list.
This will display a new list with systems to which the operation was applied.
If errors prevent correct execution, a brief message with an explanation will be displayed in the Note column.
This feature uses Cobbler power management, thus a Cobbler system record is automatically created at first use if it does not exist already.
In that case, the automatically created system record will not be bootable from the network and will reference a dummy image.
This is needed because Cobbler does not currently support system records without profiles or images.
The current implementation of Cobbler power management uses the fence-agent tools to support multiple protocols besides IPMI.
Those are not supported by SUSE Manager but can be used by adding the fence agent names as a comma-separated list to the java.power_management.types configuration parameter.
Snapshots Overview
Snapshots enable you to roll back the system’s package profile, configuration files, and SUSE Manager settings.
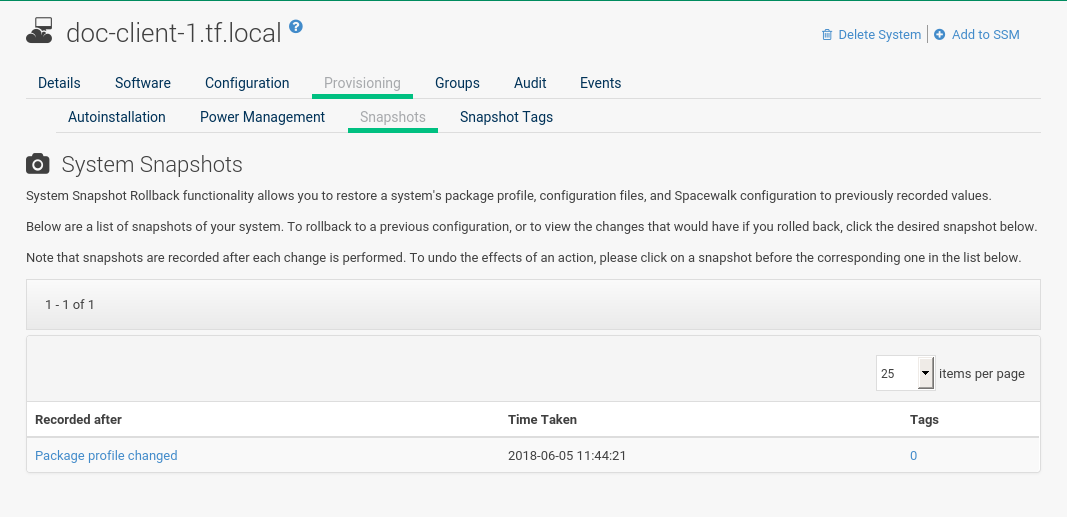
Snapshots are always captured automatically after an action takes place.
The Snapshots subtab lists all snapshots for the system, including the reason the snapshot was taken, the time it was taken, and the number of tags applied to each snapshot.
|
Technical Details
|
To revert to a previous configuration, click the Reason for the snapshot and review the potential changes on the provided subtabs, starting with Rollback.
|
Unsupported Rollback Scenarios
Snapshot roll backs support the ability to revert certain changes to the system, but not in every scenario. For example, you can roll back a set of RPM packages, but rolling back across multiple update levels is not supported. Rolling back an SP migration is also not supported. |
Each subtab provides the specific changes that will be made to the system during the rollback:
-
group memberships,
-
channel subscriptions,
-
installed packages,
-
configuration channel subscriptions,
-
configuration files,
-
snapshot tags.
When satisfied with the reversion, return to the Rollback subtab and click the Rollback to Snapshot button.
To see the list again, click Return to snapshot list.
|
Background Information About Snapshots
There is no maximum number of snapshots that SUSE Manager will keep, thus related database tables will grow with system count, package count, channel count, and the number of configuration changes over time. Installations with more than a thousand systems should consider setting up a recurring cleanup script via the API or disabling this feature altogether. There is currently no integrated support for “rotated snapshots”. Snapshot rollback gets scheduled like any other action, this means the rollback usually does not happen immediately. |
Snapshot Tags
Snapshot tags provide a means to add meaningful descriptions to your most recent system snapshot. This can be used to indicate milestones, such as a known working configuration or a successful upgrade.
To tag the most recent snapshot, click Create System Tag, enter a descriptive term in the Tag name, and click the Tag Current Snapshot button.
You may then revert using this tag directly by clicking its name in the Snapshot Tags list.
To delete tags, select their check boxes, click Remove Tags, and confirm the action.