System Groups
The System Groups page allows SUSE Manager users to view the System Groups list.
Only System Group Administrators and SUSE Manager Administrators have permission to perform these additional tasks:
-
Create system groups
-
Add systems to system groups
-
Remove systems from system groups
-
Assign system group permissions to users
For more information about system groups, see reference:systems/system-details/sd-groups.adoc. For more information about configuring system groups, see reference:users/system-group-configuration.adoc.
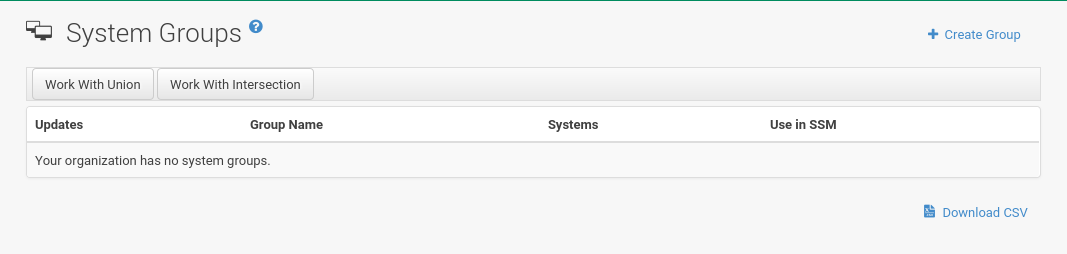
The System Groups list displays all system groups.
The list contains several columns for each group:
-
Select— Via the check boxes add all systems in the selected groups to theSystem Set Managerby clicking the Update button. All systems in the selected groups are added to theSystem Set Manager. You can then use theSystem Set Managerto perform actions on them simultaneously. It is possible to select only those systems that are members of all of the selected groups, excluding those systems that belong only to one or some of the selected groups. To do so, select the relevant groups and click the Work with Intersection button. To add all systems of all selected groups, click the Work with Union button. Each system will show up once, regardless of the number of groups to which it belongs. -
Updates— Shows which type of patch alerts are applicable to the group or confirms that all systems are up-to-date. Clicking a group’s status icon takes you to thePatchtab of itsSystem Group Detailspage.The status icons call for differing degrees of attention:
-
 — All systems in the group are up-to-date.
 -
 — Critical patches available, update strongly recommended.
 -
 — Updates available and recommended.
-
-
HealthStatus of the systems in the group, reported by probes. -
Group Name— The name of the group as configured during its creation. The name should be explicit enough to distinguish from other groups. Clicking the name of a group takes you to theDetailstab of itsSystem Group Detailspage. -
Systems— Total number of systems in the group. Clicking the number takes you to theSystemstab of theSystem Group Detailspage for the group. -
Use in SSM— Clicking theUse in SSMlink in this column loads all and only the systems in the selected group and launches theSystem Set Managerimmediately.
For more on system groups, see reference:systems/system-groups.adoc. For more on the System Set Manager, see reference:systems/ssm-overview.adoc.
Creating Groups
To add a new system group, click the Create Group link at the top-right corner of the page.
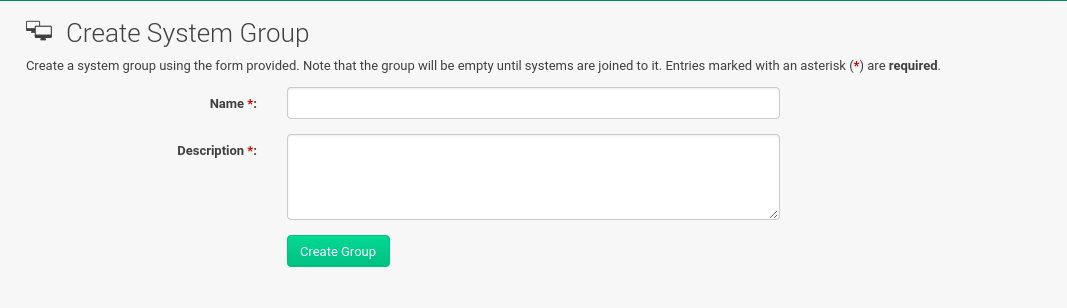
Type a name and description and click the Create Group button.
Make sure you use a name that clearly sets this group apart from others.
The new group will appear in the System Groups list.
Adding and Removing Systems in Groups
Systems can be added and removed from system groups.
Clicking the group name takes you to the Details page.
The Systems tab shows all systems in the group and allows you to select some or all systems for deletion.
Click Remove Systems to remove the selected systems from the group.
The Target Systems page shows you all systems that can be added to the group.
Select the systems and click the Add Systems button.
System Group Details
At the top of each System Group Details page are two links: Delete Group and Work With Group.
Clicking Delete Group deletes the System Group and should be used with caution.
Clicking Work With Group loads the group’s systems and launches the System Set Manager immediately like the Use Group button from the System Groups list.
For more on the System Set Manager, see reference:systems/ssm-overview.adoc.
The System Group Details page is split into the following tabs:
Group Details
Provides the group name and group description.
To change this information, click Edit These Properties, make your changes in the appropriate fields, and click the Update Group button.
Systems
Lists all members of the system group.
Clicking links within the table takes you to corresponding tabs within the System Details page for the associated system.
To remove systems from the group, select the appropriate check boxes and click the Remove Systems button on the bottom of the page.
Clicking it does not delete systems from SUSE Manager entirely.
This is done through the System Set Manager or System Details pages.
For more on the System Set Manager, see reference:systems/ssm-overview.adoc. For more on system details, see reference:systems/system-details.adoc.
Target Systems
Target Systems — Lists all systems in your organization.
To add systems to the specified system group, click the check boxes to their left and click the Add Systems button on the bottom right-hand corner of the page.
Patches
List of relevant patches for systems in the system group.
Clicking the advisory takes you to the Details tab of the Patch Details page.
For more on patches, see reference:patches/patch-details.adoc.
Clicking the Affected Systems number lists all of the systems affected by the patch.
To apply the patch updates in this list, select the systems and click the Apply Patches button.
Admins
List of all organization users that have permission to manage the system group. SUSE Manager Administrators are clearly identified. System Group Administrators are marked with an asterisk ('*'). To change the system group’s users, select and deselect the appropriate check boxes and click the Update button.
States
The States tab displays states which have been created and added using the .
From this page you can select which states should be applied across a group of systems.
A state applied from this page will be applied to all clients within a group.
|
States are applied according to the following order of hierarchy within SUSE Manager: Organization > Group > Single System |
-
Create a state using the or via the command line.
-
Browse to . Select the group that a new state should be applied to. From a specific group page select the
Statestab. -
Use the search feature to located a state by name or click the Search button to list all available states.
-
Select the check box for the state to be applied and click the Save button. The Save button will save the change to the database but will not apply the state.
-
Apply the state by clicking the Apply button. The state will be scheduled and applied to any systems included within a group.