SD Packages
Manage the software packages on the system. Most of the following actions can also be performed via action chains. For more about action chains, see reference:schedule/action-chains.adoc.
|
When new packages or updates are installed on the client via SUSE Manager, any licenses (EULAs) requiring agreement before installation are automatically accepted. |
- Packages
-
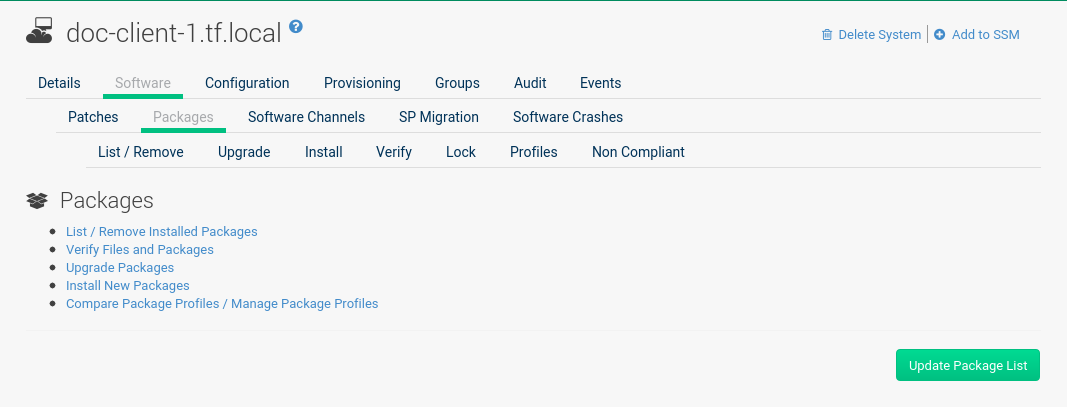
The default display of the
Packagestab describes the options available and provides the means to update your package list. To update or complete a potentially outdated list, possibly because of the manual installation of packages, click the Update Package List button in the bottom right-hand corner of this page. The next time the system connects to SUSE Manager, it updates your system profile with the latest list of installed packages. - List / Remove
-
Lists installed packages and enables you to remove them. View and sort packages by name or the date they were installed on the system. Search for the desired packages by typing a name in the
Filter by Package Namesearch field. You may also select the letter or number corresponding to the first character of the package name from the drop down selection menu. Click a package name to view itsPackage Detailspage. To delete packages from the system, select their check boxes and click the Remove Packages button on the bottom right-hand corner of the page. A confirmation page appears with the packages listed. Click the Confirm button to remove the packages. - Upgrade
-
Displays a list of packages with newer versions available in the subscribed channels. Click the latest package name to view its
Package Detailspage. To upgrade packages immediately, select them and click the Upgrade Packages button. Any EULAs will be accepted automatically. - Install
-
Install new packages on the system from the available channels. Click the package name to view its
Package Detailspage. To install packages, select them and click the Install Selected Packages button. EULAs are automatically accepted. - Verify
-
Validates the packages installed on the system against its RPM database. This is the equivalent of running
rpm -V. The metadata of the system’s packages are compared with information from the database, such as file checksum, file size, permissions, owner, group and type. To verify a package or packages, select them, click the Verify Selected Packages button, and confirm. When the check is finished, select this action in theHistorysubtab underEventsto see the results.
- Lock
-
Locking a package prevents modifications like removal or update of the package. Since locking and unlocking happens via scheduling requests, locking might take effect with some delay. If an update happens before then, the lock will have no effect. Select the packages you want to lock. If locking should happen later, select the date and time above the Request Lock button, then click it. A small lock icon marks locked packages. To unlock, select the package and click Request Unlock, optionally specifying the date and time for unlocking to take effect.
This feature only works if Zypper is used as the package manager. On the target machine the
zypp-plugin-spacewalkpackage must be installed (version 0.9.x or higher). - Profiles
-
Compare installed packages with the package lists in stored profiles and other systems.
-
Select a stored profile from the drop-down box and click the Compare button. To compare with packages installed on a different system, select the system from the associated drop-down box and click the Compare button.
-
To create a stored profile based on the existing system, click the Create System Profile button, enter any additional information, and click the Create Profile button. These profiles are kept within the page.
When installed packages have been compared with a profile, customers have the option to synchronize the selected system with the profile. All changes apply to the system not the profile. Packages might get deleted and additional packages installed on the system. To install only specific packages, click the respective check boxes in the profile. To remove specific packages installed on the system, select the check boxes of these packages showing a difference of
This System Only.To completely synchronize the system’s packages with the compared profile, select the master check box at the top of the column. Then click the Sync Packages to button. On the confirmation screen, review the changes, select a time frame for the action, and click the Schedule Sync button.
You can use a stored profile as a template for the files to be installed on an autoinstalled system.
-
- Non Compliant
-
Lists packages that are installed on this system and are not present in any of its channels.